So you’re getting drifty, and want to get some more steering angle huh? Well, I’ll try and walk you through the reasoning behind why you do or don’t need angle, popular steering angle modifications, and homebrew angle modifications.
Do I need steering angle???
First thing is first, you don’t need crazy steering angle to learn how to drift. Often I see people at drift events who toss on the crazy expensive angle kits, let’s call it “intelligent-fab”, before they have learned some of the basic drift fundamentals. What ends up happening most of the time is these guys chuck too much angle when drifting, which actually slows them down.
The next thing I have to say on it, is that there are some cars where you really don’t need any angle modifications to go out there and learn, and there are other cars that need angle right off the bat. For example, most Mustangs have turrible steering angle. They have these giant control arms that get in the way. It makes it incredibly difficult to learn how to drift because your margin of error is so small. That right there is the first point of angle kits.
Additional steering angle when learning gives you a larger margin of error for when you screw up.
This is the first thing you need to understand about steering angle modifications. You are going to screw up when you are learning, and if you initiate too hard, extra steering angle lets you bring the back so you don’t spin. You will lose a bunch of speed, but at least you won’t spin, unless you really huck it on entry, then you might spin anyway.
The reason you hear people say “you shouldn’t learn to drift with an angle kit” is because relying on this ability to correct with the steering wheel when you over angle IS A BAD HABIT. Maintaining angle and line should be done primarily with the throttle.
That said, every chassis is different though, and cars like Mustangs, are very difficult to learn on without steering angle kits. So if you have a Mustang that you want to drift, then go right ahead and buy an angle kit for it and I won’t judge you. That said, I’ve seen dudes in stock angle 240s and FC RX7s keep up with the crazy built Pro-Am level cars in a low speed course, because the driver was in tune with their car and learned how to drive it without an angle kit and they were capable of carrying the proper amount of speed through the corners. These same guys eventually tossed on an angle kit, and they were so much better of a driver because they didn’t have the bad habit of steering wheel corrections.
What steering angle modifications should I do?
Alright, so you’ve got a bit of seat time, you’ve learned how to drift your car with stock angle, and now you’re wondering what kind of angle modifications you should do to step it up to the next level. It really depends on how much power you’ve got, and the course you’re driving on. Tight, technical courses, that are common in grassroots level drifting, you really don’t need much (ie: you don’t need intelligent-fab stuffs). However, if you’ve got the horsepower to step it up to the Pro-Am level, where the courses and drivers are much faster, you’ll need a lot more angle. So… let’s talk about them. If you’re modifying stock parts (like I do) to get more steering angle, then the first thing you need to understand is tie rod end to control arm clearance is the biggest limiter. If you have clearance, then you can keep modifying stuffs. I’ll get more in depth with this later.
Steering Rack Spacers

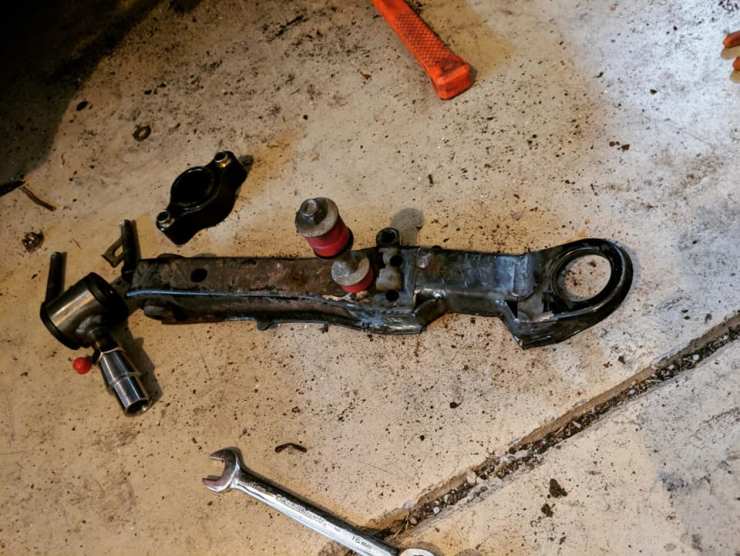
bump stop limiter (left), slip on spacer (middle), bolt on spacer (right) 
Two different types of bolt on spacer pictured. One on the steering rack, one on the floor. Typically bolt on spacers will go on the passenger side of the steering rack. 
This is where the bolt on steering rack spacer typically is placed.
One of the first steering angle limitations on most cars is the inner tie rod end bottoming out on the steering rack housing. One of the most common steering angle modifications is to put a slip-on or bolt-on steering rack spacer between the inner tie rod end and the steering rack. This essentially lengthens the steering rack, which allows more steering travel, giving you more steering angle. Some vehicles have bump stops on the rack or the control arms that have to be removed to use rack spacers though.
There are offset steering rack spacers on the market now, because with too much angle you’ll overcenter/tie rod ends bind. These offset the tie rod mounting forward of the rack. DO NOT USE THESE RACK SPACERS. AVOID THEM LIKE THE PLAGUE.
Most of the steering rack failures I’ve seen in a decade of being involved in drifting have been from offset steering rack spacers. They bend/break racks, cause power steering leaks, etc. I will touch on what to do in these cases in the “homebrew” section of this article.
Steering Knuckle Modifications
When people modify their steering knuckles, there are a few different things that they are doing. First, they shorten the steering knuckle. Second, they change the location of the tie rod end in relation to the ball joint for a “zero Ackermann” or “reduced Ackermann”. Let’s talk about shortening the knuckles first.
Shortening the steering knuckles “quickens” your steering ratio, meaning it takes less rack travel to get to the same steering angle as it does with longer steering knuckles. So, if you have rack spacers already, and your tie rod end has clearance between the control arm, then you might consider some shorter steering knuckles to get more steering angle. HOWEVER, if you go to short, you’ll end up with less angle, because the tie rod end will contact the control arm sooner. It’s a balancing act to get it perfect.

Ok, now ackerman. If you look at these knuckles, the ball joint hole (2nd from the top) is almost perfectly in line with the tie rod end hole (bottom hole). The basic explanation of Ackermann is the position between these two holes is the Ackermann measurement. Let’s imagine a normal car, normal knuckles. When you make a turn, each wheel has to turn at a different radius. The inside wheel travels at a tighter radius, and the outside wheel travels at a wider radius. So, when you’re turning, to prevent your tires from fighting each other and causing tire wear, Ackermann angle is introduced at the steering knuckle. This allows the front inside wheel to turn at a tighter radius, and the outside wheel to turn at a wider radius.
When you’re drifting, you aren’t turning in the same way. You are countersteering, and you want your wheels pointed roughly in the direction that you want to go. If you have zero Ackermann or reduced Ackermann, it means your front tires won’t scrub/fight each other, so you’ll reduce your tire wear, carry more speed, and probably be able to take a better line. By going to this style of a steering knuckle, you’re moving the tie rod hole outwards a little bit, which gives you more clearance between the tie rod end and control arm for more steering angle.
Rack spacers and modified knuckles are pretty much what 90% of drifters need, because 90% of drifters are grassroots guys, or who just like going out to bashes and having a good time with the homies.
Go Big or Go Home with your Homebrew Angle Stuffs.
Alright, now we’re getting a bit more into deeper DIY steering angle modifications. Let’s say you’re a weirdo like me who will never really be competitive at a Pro-Am level, but you just wanna level up your car to the max.
At a certain point of steering angle modification, you’ll get so much angle that your steering will binding at or close to full lock. This is because you are overcentering your tie rod ends compared to your rack. Essentially you have so much steering angle that when you are at full lock, one of your tie rod ends is in front of the steering rack itself, which has caused it to bind and not want to move. There are two ways to fix this issue: The first is a terrible solution, offset rack spacers. Like I said earlier, these should be avoided at all costs. They cause steering racks to bend and break, tie rod ends to break, power steering racks to leak, and more. Don’t use them unless you have to.
The second solution is more difficult, but if you have a pal with a welder and an angle grinder, you can get it taken care of. This solution is relocating the steering rack forward on the subframe for rear steer cars, or relocating it rearward on front steer cars. The “go-to” amount is usually 1″, or 25mm. Here are some pictures of the process on my subframe.

Here you can see I chopped out the steering rack brackets, sitting infront/underneath the subframe on the messy work bench. I marked out .5″ and 1″ on my subframe. I did it in .5″ increments to make sure that the steering rack and tie rod ends would still clear the subframe. It is important to cut as straight as possible to make sure you aren’t trying to plug holes and stuff when you weld it back together.

Here it is welded back together. Some of the welds were a little boogery, I didn’t have a sand blaster and there was tons of grime caked inside and outside of this 30+ year old subframe that I didn’t clean well enough. I added some gussets later to make sure it wasn’t going to crack and fall apart.
Alright, so now that you’ve made more room so you don’t overcenter, now you can do another thing to get more steering angle, like extending, notching, and boxing your control arms for tie rod end clearance.
Extending the control arms gives you a wider track and more negative camber for better grip at angle (there is a ton of science to alignment stuff that I’ll cover in another article). it also gives you the ability to clear things like tension rods/caster rods with your knuckle/tie rod end, as well as the frame rail/inner fender with your wheel/tire. So, you extend the length for the desired track width, camber, and clearance, then you notch for steering angle, lastly you box it in underneath for strength.

This was the first set of extended, notched and boxed control arms I personally made for my AE86. The notches weren’t all that great, the welds are messy, but they worked. These control arms were pretty trashed already from a previous project, so I used them as mock up while I had a second set that I would do a better job on. These were 2″ extended, but they didn’t provide enough clearance for the knuckle/tie rod end to tension rod, so I couldn’t utilize all of the rack travel that I had. The next set I extended 3″, and that seems to be the magic number for the steering knuckles I’m using.
I made the notches a little bit different, and they’re not not the prettiest thing you’ll see, but they work and they are strong. They gusset used to box them in is dimple died for extra strength. I’ve been using them for about a year now with no signs of failure, and I’ve done some “landscaping” off-track several times. I broke suspension mounts off of the rear axle and these stayed solid, so I’m pretty happy with the results.
Something else to consider when building control arms is the angle you set your ball joint at changes your roll center/bump steer. I had mine set as close to stock as possible with my tools, however, the next set I make I plan on leveling the ball joint out, or possibly angling it back the other direction so I don’t have to run bolt on roll center adjusters. I’ll have to take some additional measurements and get a good roll center and eliminate bump steer.
If there is something I missed, or something that I am incorrect on, please shoot me a message from the home page. I want to make sure the information I am putting out there is as correct as possible for everyone to reference.